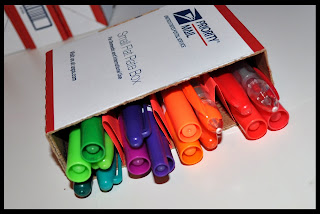
-My small part in saving the planet-
And since this year I plan to get more organized I started thinking
Hmmmm….
I came up with an awesome idea that not only RECYCLES those old boxes but ORGANIZES my markers also. This project requires very minimum supplies and is quite easy.
So lets get started…..
Materials needed
Box
(mine is a used small flat rate usps box)
Pencil
Ruler
Tape
(not pictured)
Box cutter
(or something sharp to cut with)

Step 1
- Cut the box in half equally
- Use the ruler to find the middle and place a mark at both ends of the box
- Draw a line connecting the marks
- Carefully cut all sides of the box
 |
| Mine was 4 1/4 inches |
Step 2
- Stack the boxes up the way you like.
Here are a couple of ideas…. Be creative
Step 3
- Tape all the boxes together in the formation you prefer.
- Make sure to tape along the cracks of where the boxes meet for a stronger hold
- Follow my guide below
(Follow the black lines with white dashes)
Step 4
Just for fun
(Picture coming soon)
Decorate your marker storage
Use scrapbook paper, left over wrapping paper, fabric, etc.
Now ORGANIZE!!!!!
Allows for better visibility of color choices
Takes up the least amount of space
Versatile and no tape required
Alternative #1
If your short on boxes or don't have a lot of markers to store this is a great alternative.
Fold a piece of card stock to make dividers.
(You can make as many as you want, this setup makes 4 sections)
The flat pieces are measured at 1 inch.
The triangles are 2 1/2 inches then folded in half
The cardstock is the same width as the box
Place the folded card stock in the box and place your markers inside
Alternative #2
Use one to just make a pen holder
Have fun ORGANIZING!!


No comments:
Post a Comment